Money Drawing With Cast Money Drawing Easy
They say money makes the world go round, and whether that's true or not it's certainly nice to have!
Money has come to be a visual symbol for wealth in movies, stories and artwork through the years.
It comes in many variations depending on the country, so it can make it fun to learn how to draw money as you can create different variations.
By the time you reach the end of this guide, you will be a master at drawing a stack of money!
We hope that you enjoy this step-by-step guide on how to draw money in just 7 steps!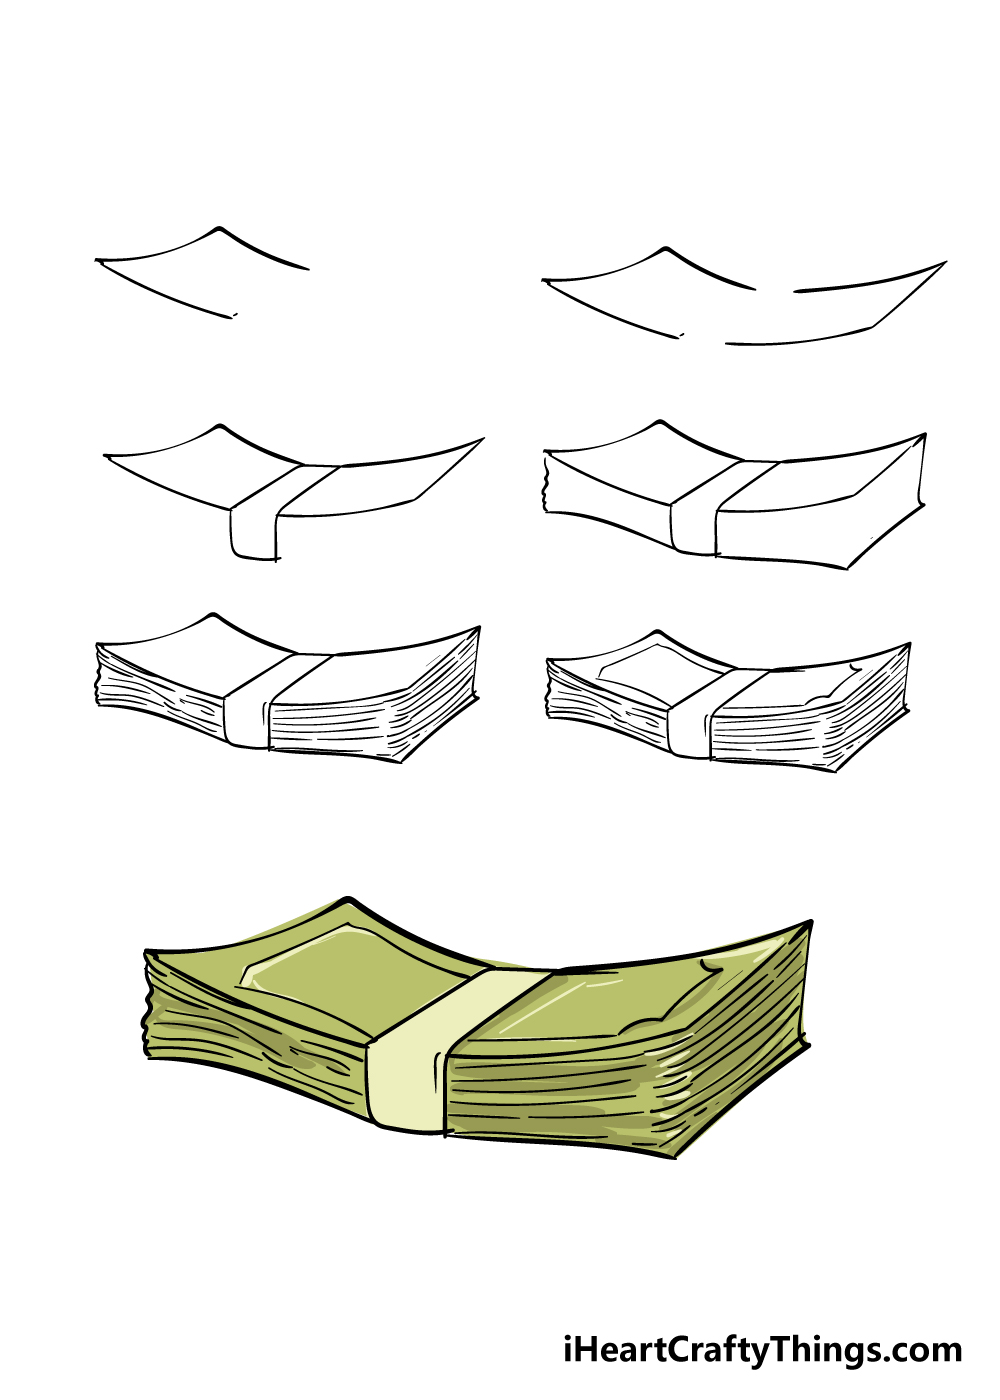
What's in this Blog Post
- How to Draw Money – Let's Get Started!
- Step 1
- Step 2 – Next, draw the other side of the money stack
- Step 3 – Now, draw the band holding the money together
- Step 4 – Next, draw the sides of the money stack
- Step 5 – Draw some lines to show the individual notes
- Step 6 – Next, draw the final money details
- Step 7 – Now finish off your money drawing with some color
- 3 More tips to make your money drawing easy!
- Your Money Drawing is Complete!
How to Draw Money – Let's Get Started!
Step 1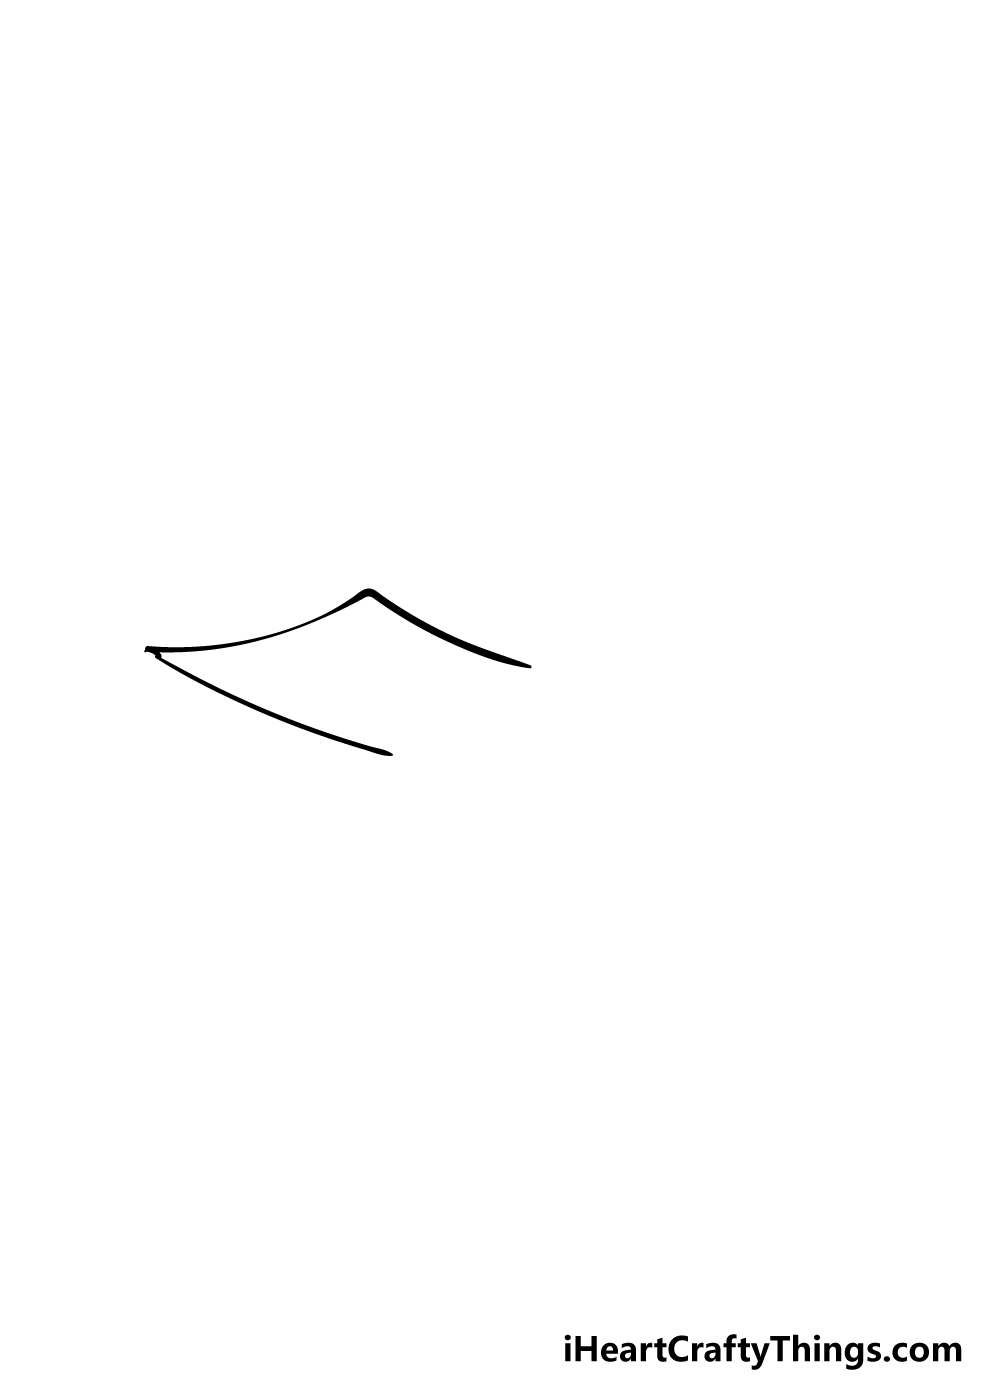
We will kick off this guide on how to draw money by drawing the left-hand edge of the money. To do this, you can draw some curved lines that are at a bit of an angle.
It should make you end up with a shape that looks like half a curved rectangle.
Once you have this line shape drawn, we can add to it in the next few steps!
Step 2 – Next, draw the other side of the money stack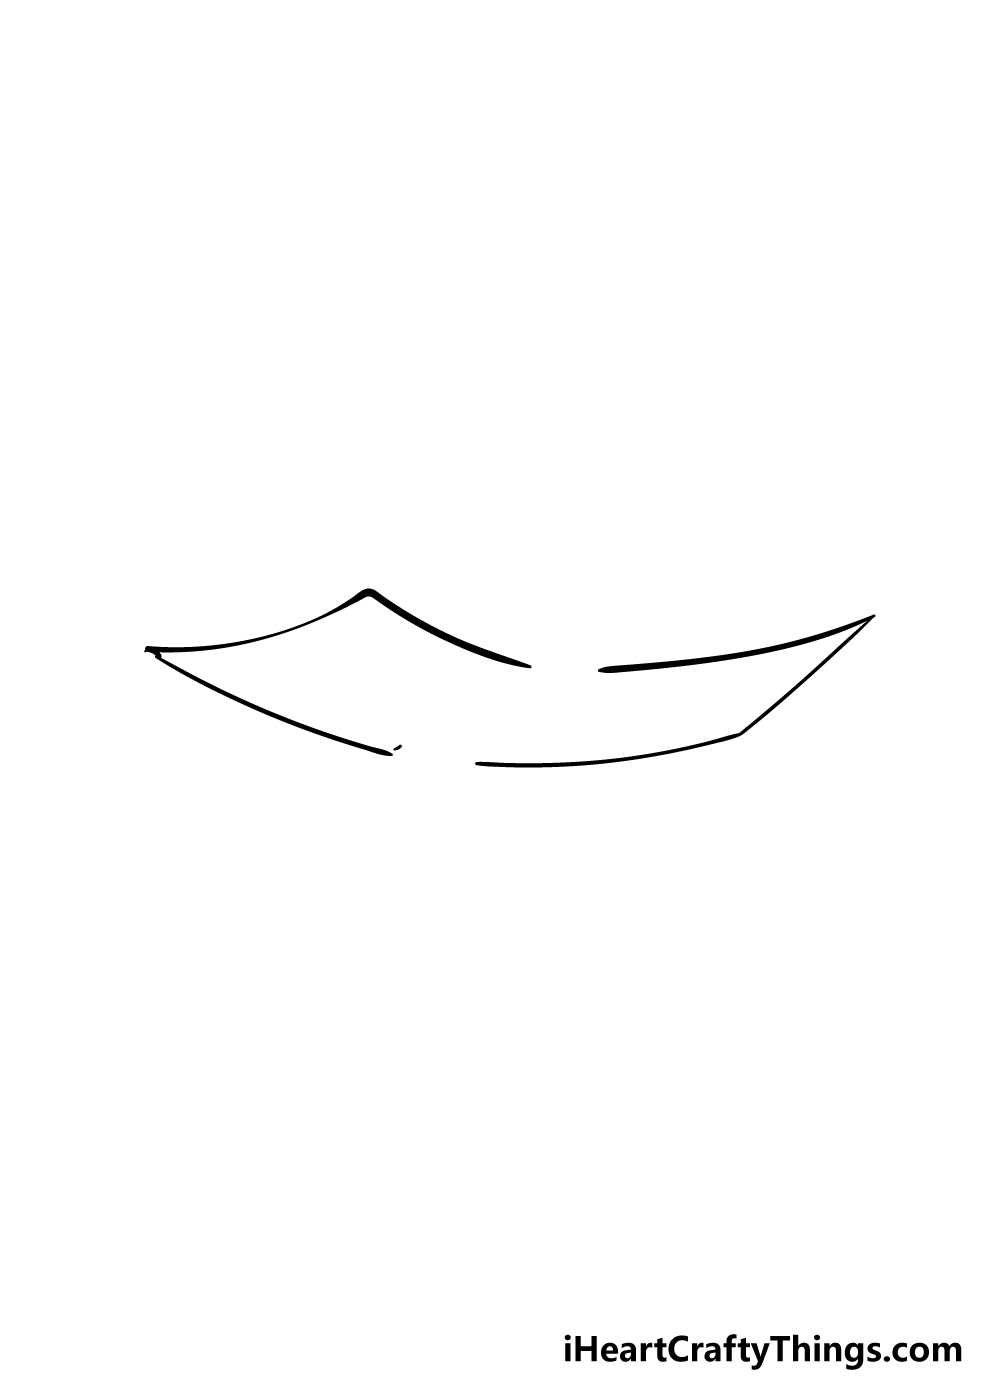
In this second part of your money drawing, we will be replicating what you did in the previous step.
Simply draw another curved half rectangle shape that is facing the opposite direction to the one that you drew in the previous step.
There should be a slight gap between these two shapes, as this is where we will be adding the band holding the stack of money together.
Step 3 – Now, draw the band holding the money together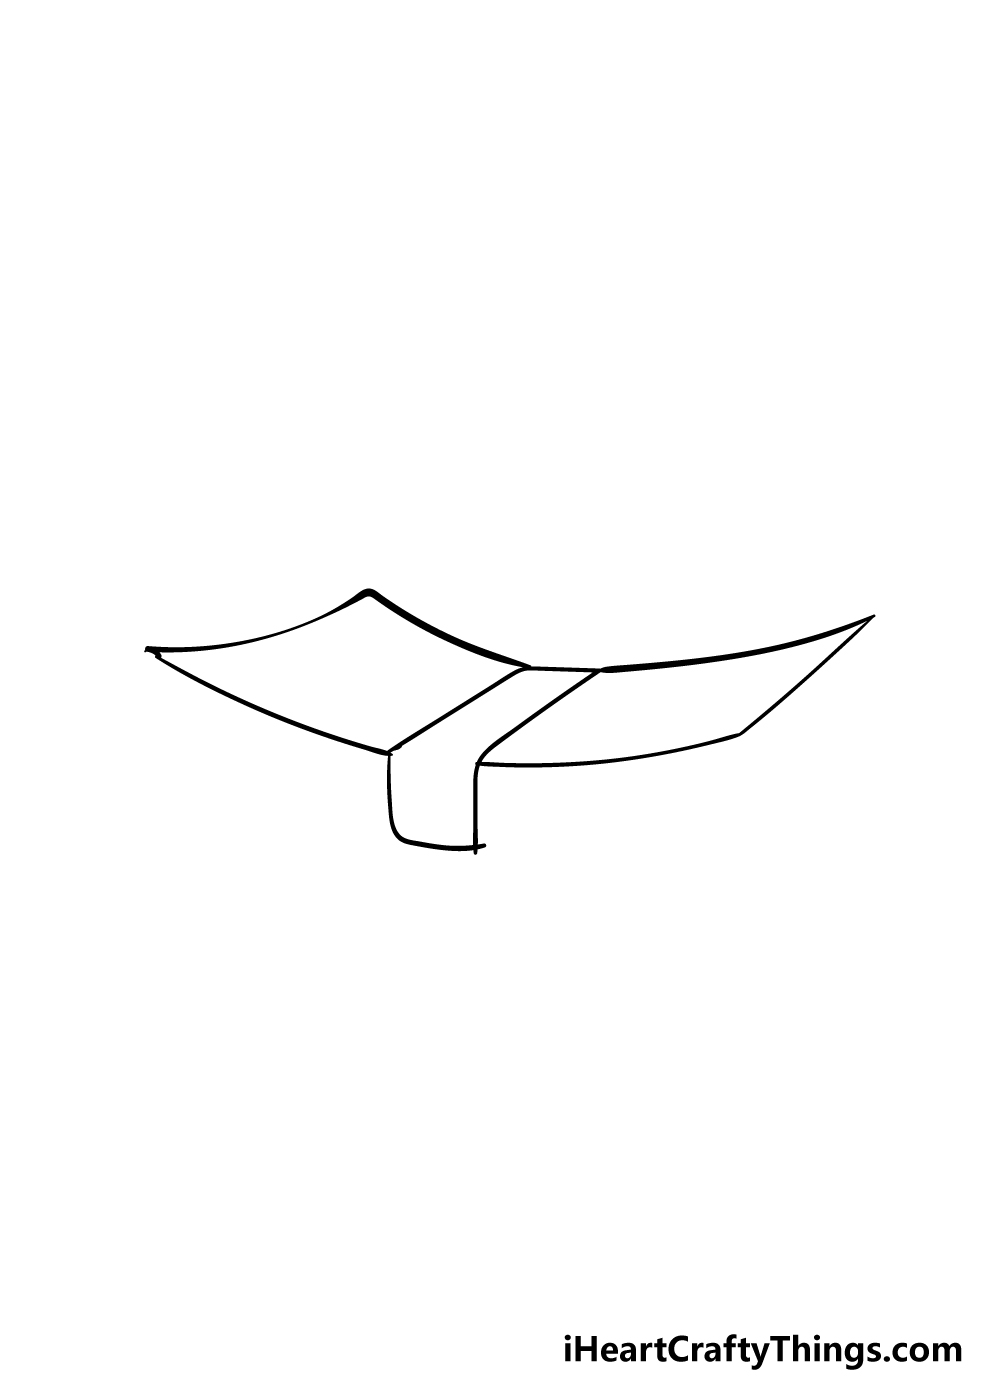
We will be adding a band that is holding the money together in this step of our guide on how to draw money.
To do this, you will be filling in the empty space that you left between the two half rectangle shapes. The band will fill this space and then also extend downward from the top of the money.
Step 4 – Next, draw the sides of the money stack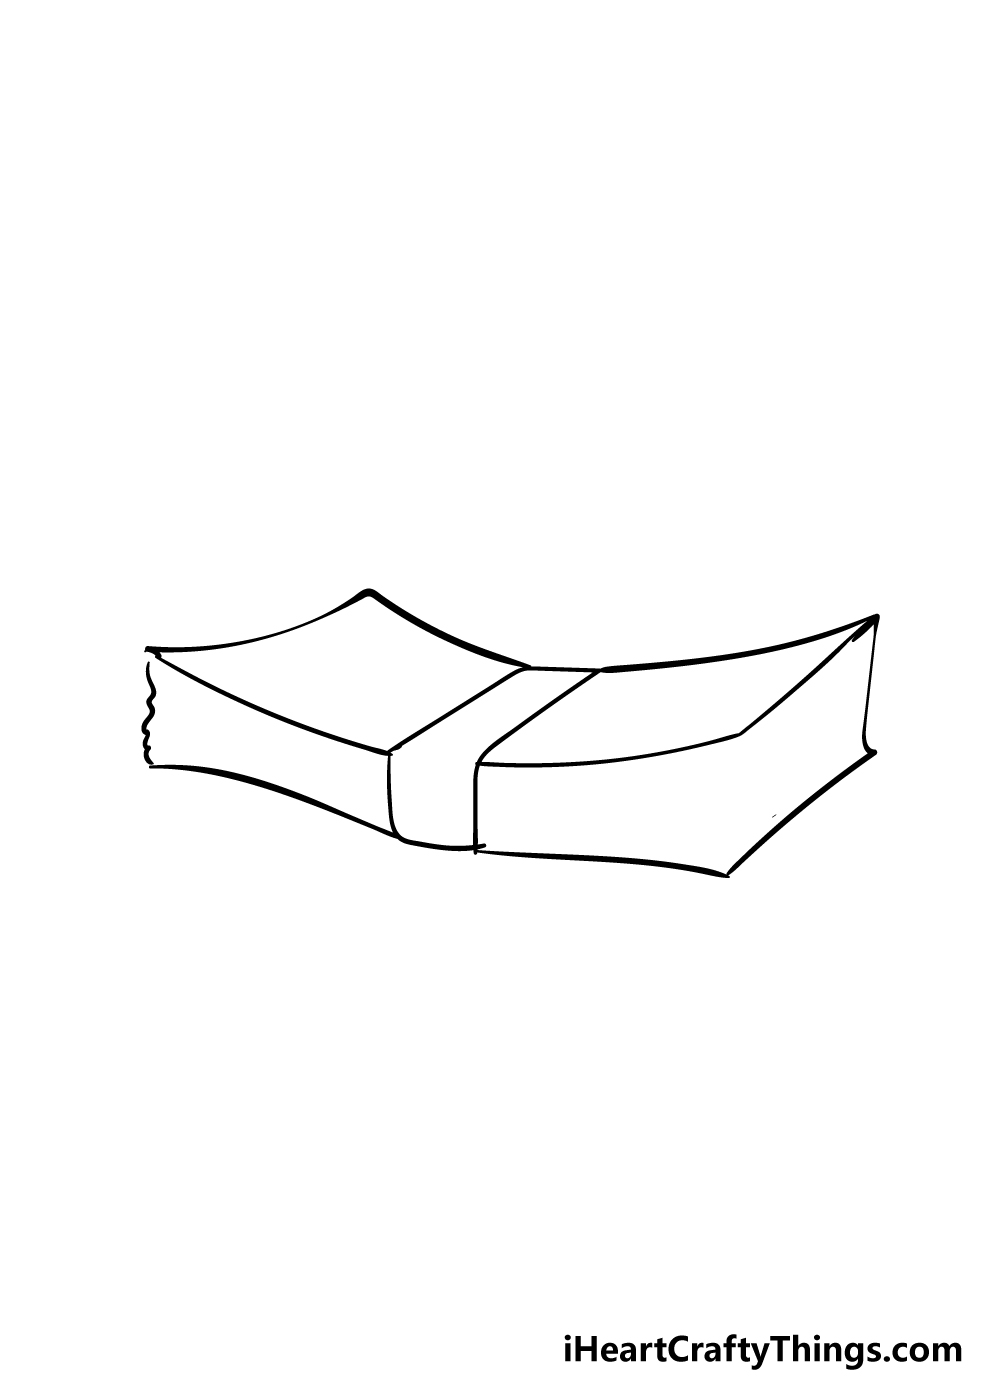
It's time to add the sides of the stack of money in this part of your money drawing. To do this, you can use some slightly jagged lines on the left-hand vertical side of the money stack.
This will give the appearance of lots of money notes stacked on one another. The lines on the bottom and right-hand side of the money will be much smoother, as shown in our reference image.
Step 5 – Draw some lines to show the individual notes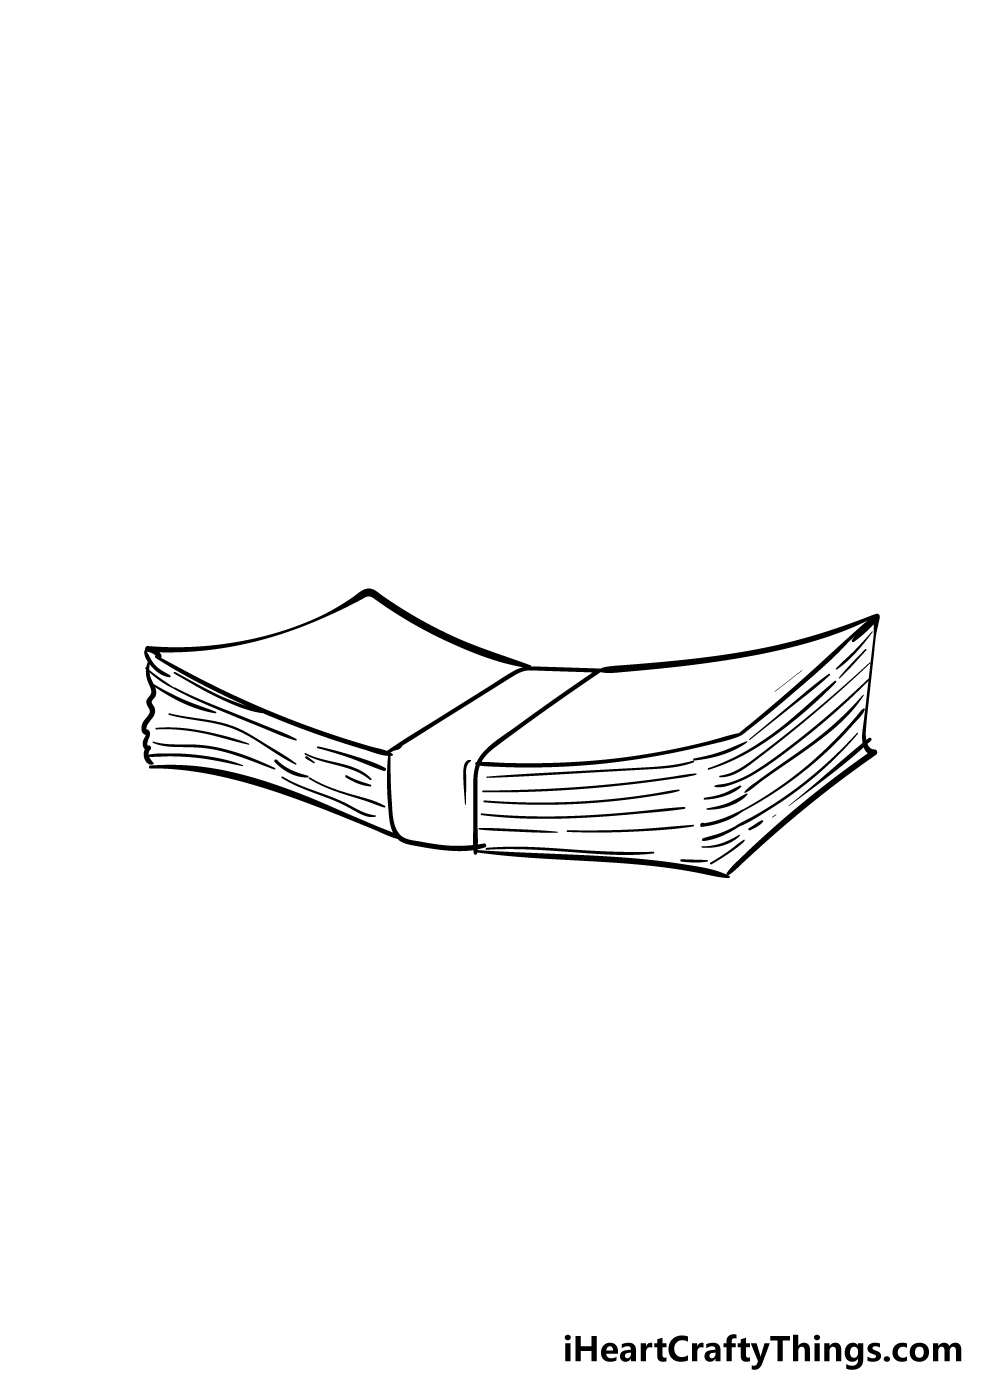
Now that the outline is drawn, we shall focus on some details in the next few steps of our guide on how to draw money.
For this step, you can add lots of thin lines to the sides of the money. These can be quite irregularly spaced like the ones in our example, as the money is packed quite tightly together by the band around it.
Once you have these lines drawn, it's on to the final few steps!
Step 6 – Next, draw the final money details
This part of your money drawing is all about adding some of the final details to it. You could also add some of your own elements to further personalize it!
To finish off our details in this step, you can draw some lines along the perimeter of the lines of the very top note.
That will finish off our detailing for this guide, but as we mentioned you can always add some of your own!
You could use a note from the currency of your country to draw on to this drawing for a personal touch.
If you have some currency from a favorite country that you've visited then you could use that as well!
Some other ideas would be to draw even more stacks of money, or you could draw some coins sitting around the money drawing.
What extra details can you think of to finish off this drawing?
Step 7 – Now finish off your money drawing with some color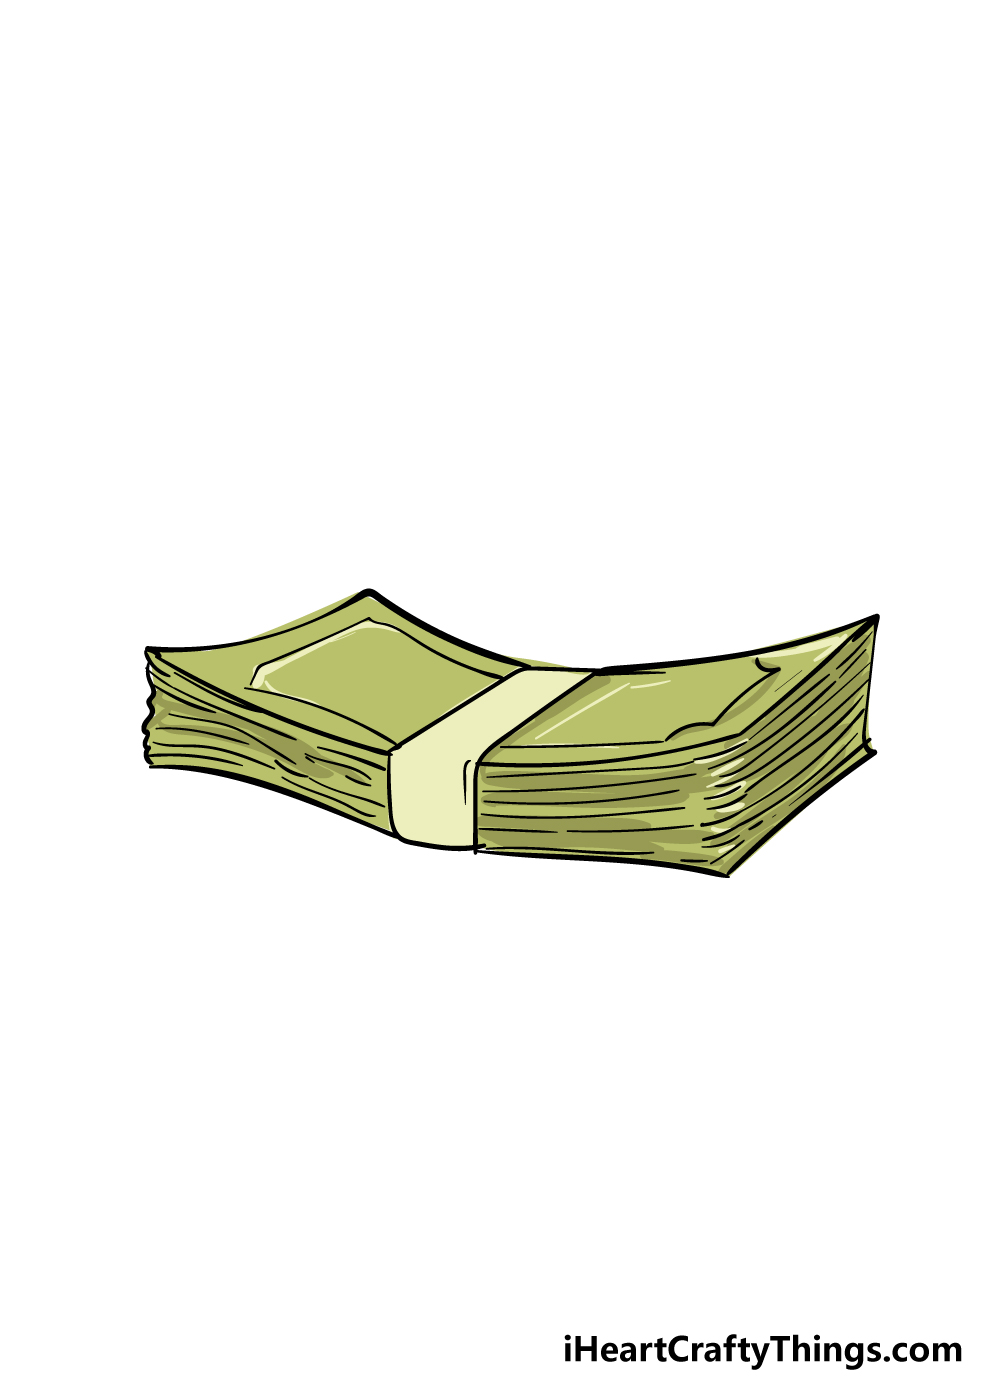
In this final step of this guide on how to draw money, you can finish it off by adding some beautiful colors to the image!
Money can come in many different colors and designs depending on where it comes from and what amount of money it is. This gives you a lot of options for how you could color in this money stack.
You could even get extra creative with it and create your very own new currency! What do you think a new kind of money would look like?
Once you know which colors you would like to use for your money drawing, you could also experiment with some art fun mediums!
You could use some mediums such as paints or colored pens and markers if you would like a more bright and vibrant look to your money drawing.
On the other hand, some colored pencils and watercolor paints would be great for a lovely softer look to the image.
Any mediums you chose will be amazing, so we can't wait to see what you choose!
3 More tips to make your money drawing easy!
End up with a picture that looks like a million bucks with these 3 easy tips!
Even when you have steps to follow, drawing any kind of recognizable object can present many challenges.
We see money quite a lot, but it can still be hard to create a convincing money drawing. If you have any paper money on hand, you can use it as a model to draw from to get smaller details looking good.
If you don't have enough cash handy to make a stack like this picture, you could use a stack of normal paper cut into the shape of money.
Put a banknote on top of the pile, and then you have your own pile of money to use as a model!
Perhaps the hardest part of creating this money sketch is getting the shape of the stack to look correct.
If you struggle with this, you can practice using a pencil. Try to focus on drawing just the outline of the stack, and then start adding finer details once you have the hang of it.
There's no harm in trying multiple times to get the hang of it! Your persistence will pay off with an amazing drawing at the end of it, so it's definitely worth it to take your time.
Our last time for this drawing of money involves the color. You could go with a standard green, but maybe you're trying to recreate a more specific currency from somewhere else in the world.
Money comes in many different colors throughout the world, and it can be tricky to match the colors.
If you have some examples of this money on hand, you can use it and a rough piece of paper to try out different colors until you find ones that match.
If you don't have your desired currency on hand, you can look up pictures online.
Using the real thing is always preferable, but using pictures is the next best thing! What colors and mediums will you use for this picture?
Your Money Drawing is Complete!
That brings us to the end of this guide on how to draw money! We hope that you had a lot of fun working with us on this guide to end up with an amazing money drawing!
By working on a guide like this and following some steps, it can really make a new drawing so much easier to do. Now it's u to you to put your own spin on this drawing.
You could do this by adding your own details such as different money types from around the world or by experimenting with different colors and art mediums. We can't wait to see what you come up with!
Once you have finished with this guide, the good news is that the fun doesn't have to end! We have plenty of amazing drawing guides on our website for you to enjoy, so e hope you will visit us there.
We also upload new guides all the time, so logging on often is the best way to never miss out.
Once your money drawing is finished we would love to see your artwork! You can let us take a look by sharing it on our Facebook and Pinterest pages for us to admire.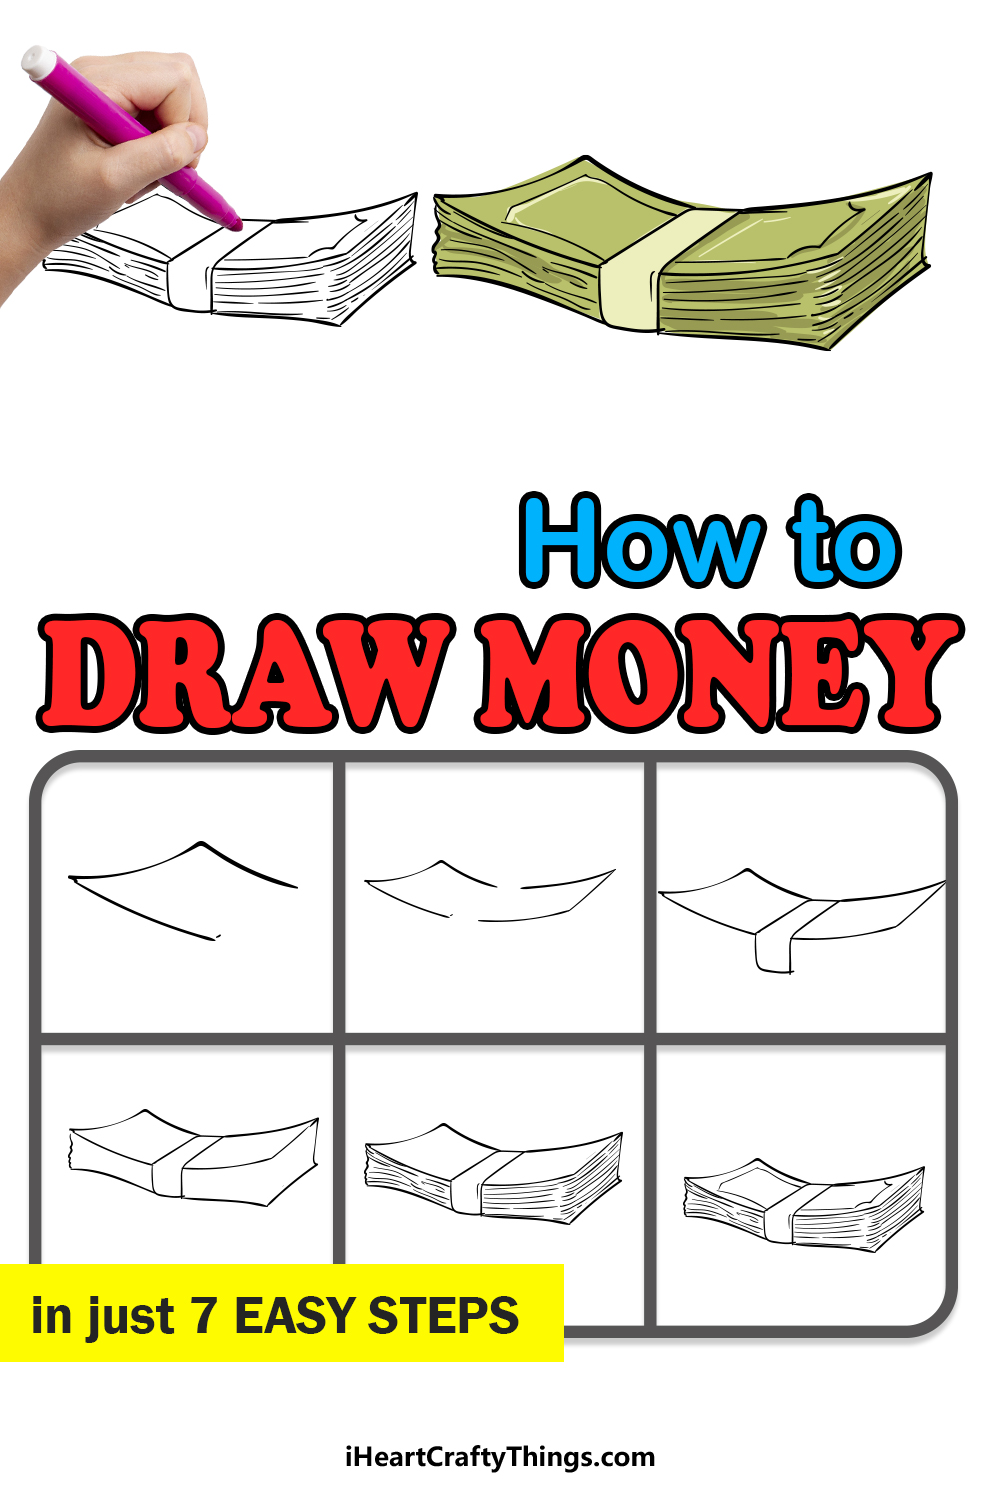
Source: https://iheartcraftythings.com/money-drawing.html
0 Response to "Money Drawing With Cast Money Drawing Easy"
Post a Comment